Game consoles
Updated on December 19, 2025
December 19, 2025
12 mins read
Miguel G.
Sr. Tech Copywriter (US)
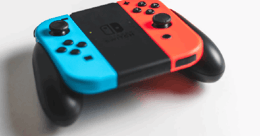
Nintendo Switch controllers are well-liked by most of us thanks to their comfortable design, tactile controls, and button layout, but many of us rethink our stance on loving them when they stop working. Unfortunately, no matter how well-designed a controller is, it will inevitably experience issues at some point.
With the Nintendo Switch controller, these issues manifest in the form of stick drift, missed inputs, disconnections, and charging problems. The good news is you won’t need to stew for long thinking the Nintendo Switch controller has done you wrong, because most of these issues are fixable at home.
In this guide, our team at Back Market has compiled five fixes in a step-by-step breakdown on how to fix a Nintendo Switch controller. Plus, our repair tips apply to both the Joy-Con and the Pro controller, so there’s no need for more internet sleuthing to find different fixes. And if you’re worried about your warranty, don’t be. Our fixes stay well within the safe, warranty-friendly category, and we’ll point out when deeper hardware fixes might require professional repair.
✨ Start by updating your Switch and recalibrating the sticks to rule out easy fixes. If that doesn’t work, re-pair the controller, clean gently around the joystick to tame drift, and make sure you’re using the official dock or grip for charging. When nothing else works, reset your controller, or skip the hassle and trade it in for a refurbished replacement that won’t give you grief.
We know that with all the information out there on how to fix a Nintendo Switch controller, it can be easy to go down the wrong rabbit hole and try fixes that make things worse. But do you know what won't make things worse? Following the advice that we’ve shared in this guide on how to fix a Nintendo Switch controller.
For years, our professional refurbishment technicians have been refurbishing controllers and consoles daily, often working on Nintendo Switch devices and accessories. When refurbishing, we always follow manufacturer-approved steps first, ensuring we have firsthand knowledge of what can and cannot be done.
We’re going to share this knowledge with you, but we’re going to take it a step further. In our guide, we’ve paired our refurbishment expertise with official Nintendo troubleshooting advice on topics such as updating, calibrating, pairing, and charging solutions. Armed with this information, you’ll have a better idea of where to start, and you can trust that you’re taking action the right way without voiding any warranties or making matters worse.

Simple items like cotton swabs, compressed air, and a microfiber cloth can make controller fixes quicker and easier.
We know you’re excited to learn how to fix a Nintendo Switch controller, but before you rapidly scroll down the page, let's discuss what you’ll learn and what you need.
Firstly, depending on the cause of your Nintendo Switch failing to work, you may need:
A dry soft brush
Cotton swabs
Compressed air
A microfiber cloth
A USB-C cable
A Dock or charging grip.
Then, we’ll address the step-by-step fixes in the order that makes the most sense. These steps will act as troubleshooting tips and solutions. We’ll also proceed from the most involved to the least involved fix, and we won't share anything that could compromise your warranty.
Nintendo Switch controllers can be finicky tech beasts that don’t do what they are supposed to, which can make fixing them feel like an uphill battle.
Fortunately, we’ve tamed this beast a time or two…thousand, so we know exactly what you need to try before throwing in the towel and calling in tech support.
So, let’s have a look at our simple steps below.

A quick trip to the settings menu often fixes weird joystick behavior or drift.
First of all, your Joy-Con is not possessed. We know it might be acting like it is, but it's not. It's more likely an update and calibration issue that needs to be solved. To fix this, you need to check the basics. This means you need to go to your Switch’s settings and ensure your system and controllers are updated.
Often, Nintendo — the sneaky system that it is — will slip in fixes that solve many pesky bug issues, and on the surface, this is a good thing. However, it can alter your settings and require an update. After you’ve checked the update, you might as well have a look at calibration while you’re in the system settings.
Sometimes the stick drift or weird button behavior is just caused by your system forgetting where “center” is. If calibration and updating are unsuccessful, the hardware is likely worn, indicating it may be time for a new or refurbished controller.

Resetting the connection can solve those sudden disconnection tantrums.
If your Nintendo Switch controller isn’t working, it may be due to a connectivity issue. Your Nintendo Switch controller can be just like your Wi-Fi in the sense that it can also throw a tantrum and require a reset to work properly again.
When your Joy-Con or Pro controller won’t connect, go to the “Change Grip/Order” menu on your Switch. Once there, re-pair the controllers. If this doesn’t work, you can try resyncing the Joy-Cons or Pro controller by sliding them directly onto the console.
Nine out of ten times, this is all it takes to solve this type of problem. However, if re-pairing fails, you may have a dead battery issue, and no matter how hard you mash buttons or re-pair and re-sync it, it won't resolve anything.

A gentle puff of air might buy you more gaming time before replacement is needed.
For gamers the world over, the most frustrating controller issue by far is stick drift. It often happens at the worst time and can completely ruin an otherwise enjoyable gaming session. When it starts to happen too often, though, you need to begin exploring how to fix a Nintendo Switch controller with drift issues, but it's not so easy.
There are two ways to try to fix stick drift, but depending on the cause of the drift, they might not be effective. Stick drift happens when the joystick's internal sensors wear down or collect dust. For starters, you can try using a clean cloth to gently clean around the base of the stick. If that doesn't work, you can try using compressed air at the base — at a safe distance of six to eight inches — for a quick fix. Just remember, there’s no need to blast it like you’re inflating a balloon.
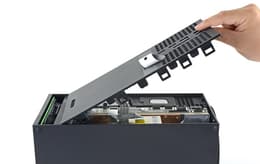
But here’s the truth: the only permanent solution is to replace the joystick module. Nintendo knows this, too, which is why they offer repairs. If you’re still under warranty, we recommend you let Nintendo handle it. If not, a refurbished Joy-Con from Back Market is usually faster (and cheaper) than mailing yours off.

Using the official charging dock or grip ensures the battery lives its best life.
Often, a big problem Nintendo users face is their controllers ghosting them mid-game. Not only is this frustrating, but it can also indicate a battery or charging issue, as Nintendo Switch Joy-Con batteries are designed to last approximately 20 hours.
If yours is dying much faster, you need to make sure you’re charging your Nintendo Switch controllers with the official charging grip or dock to fix this problem.
But that’s not all; you also need to confirm that your controller is actually charging by looking for the lightning bolt icon that appears on the screen when it's plugged in. Sometimes the charging ports can be broken or clogged with dirt.
You can use a cotton swab to give the port a quick clean to check if the port's dirtiness was the issue. Put it back on charge with the type-C cable after cleaning to check if it’s working.
Additionally, if the port is fine but you’ve been using third-party chargers, your battery may be damaged. It might be time for a battery replacement if it refuses to charge or to hold a charge. Unfortunately, these chargers aren’t designed for Nintendo services, even if they claim to be, and often don't provide the correct voltage or surge protection.

The last resort before repairs is a full reset, which can sometimes bring a stubborn controller back to life.
If nothing else works, it’s time for a full reset or power cycle. You may also need to come to terms with the fact that it may be time to move on. You can power cycle the Switch, reset controller connections, or use the tiny reset button on the Joy-Con’s back, which you’ll find near the SL/SR buttons, using a paperclip.
If your controller still refuses to behave, don’t waste more weekends troubleshooting, as this is where repair or trade-in comes in. Remember: Nintendo offers free Joy-Con drift repairs under warranty in many regions. If you’re out of warranty, a refurbished replacement is usually faster and cheaper than mailing yours in. At Back Market, you can swap broken gear for credit toward a refurbished replacement that has been cleaned, tested, and given a second chance at life.
Step | Quick Takeaway |
|---|---|
1: Update and calibrate | Updating and calibrating often fix controller issues with weird behavior or joystick drift, but this isn’t always the case. |
2: Re-pair the controller and reduce interference | Connectivity problems are usually resolved by re-pairing or resyncing your Joy-Cons or Pro controller. |
3: Tame stick drift (the safe, no-opening route) | Stick drift can be caused by wear and tear or dirt buildup. Fixing wear and tear isn't possible on your own, and you may need Nintendo's assistance or it’s time to buy a new controller. |
4: Fix charging problems | Nintendo Switch controller batteries should last about 20 hours. If yours doesn't, it could be a faulty battery or a problem with charging, requiring better charging practices or equipment, or even replacement. |
5: Power cycle and reset pairings, then repair if needed | Try to power cycle and reset pairings if your controller isn’t behaving as it should. If the controller still refuses to work, it might be time to send it in for repairs or trade it in to get credit for a refurbished model at Back Market. |
Nintendo Switch controllers are quality devices made by a reputable brand, but they aren’t infallible. As we have said, there will come a time when you need to repair it or trade it in when the fixes we shared no longer work.
Once battery issues arise, stick drift starts happening, and power cycling no longer works, it's downhill from there. The good news is you can turn to refurbished Nintendo Switch controllers and consoles at Back Market.
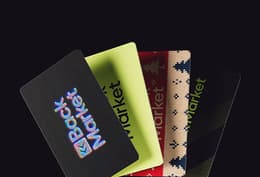
Refurbished controllers are thoroughly cleaned, expertly tested, and carefully restored to their original condition. They guarantee premium functionality and cost a fraction of the price of new.
We can confidently say that they are highly unlikely to cause you battery, drift, charging, updating, or pairing issues. Of course, updating, pairing, and calibrating will still be “fixing” steps you have to take periodically, but this problem isn't usually with the controllers themselves. And if you buy from us, they come with a warranty, which provides peace of mind if the device ever encounters problems.
Plus, there's another upside to choosing refurbished over brand new. When you make the decision — the right one, in our opinion — to buy a professionally refurbished Nintendo Switch controller, you’re helping the planet.
While it is often not immediately apparent, buying refurbished products reduces the need for new manufacturing, which in turn cuts down on resource extraction and emissions. So why not choose refurbished?
If repairing your Nintendo Switch controller just isn't worth it, we understand, and we want to make the situation a little less disappointing. This is why we offer a trade-in program. With our trade-in program, you can offset the costs of upgrading both on your pocket and the environment.
The process is straightforward and consists of only three steps. You send us your broken controller, we offer you a quote, and then you accept and get the money as credit or cash. You can use this for another controller or on any other product we offer. We have a wide range of technology available, from consoles and laptops to earphones and tablets.
A new Nintendo Switch controller isn’t chump change. It can cost a pretty penny when you buy new, and it just might not be affordable right now. The solution? Buy refurbished.
Below, we’ve shared the cost of a new vs. a refurbished controller and how much you’re actually saving. Spoiler alert: It’s more than you think.
Model | Back Market refurbished price | Price of new | Percentage saved |
|---|---|---|---|
Joy‑Con (L)/(R) Standard Set | $74.99 | $100.00 (Nintendo) | 25% |
Nintendo Switch Pro Controller (original) | $45.00 | $79.99 (Nintendo) | 43.7% |
If you’re one of the lucky ones, your Nintendo Switch or Pro controller issues will disappear after you apply the update and calibrate fix and perform a re-pairing. If you’re not, and it seems the stick drift isn't going anywhere after being cleaned, it might be time to either send it away for repair if it’s under warranty, or replace or repair it with us at Back Market.
With us, you won't struggle when you don't have to. We offer a competitive trade-in program, and our refurbished controllers come with guarantees and warranties.
We also have a wide selection of other tech goodies for sale at significantly lower prices. So, you might even be able to pick something else up with your new controller, like… and this is just a suggestion… a new Switch console. If you’re ready to concede defeat and embrace a refurbished controller, check out your options here.

Miguel is always looking for new ways to provide unique perspective on popular tech and has taken his writing to the refurbished industry to promote sustainability. Outside of creating content, you might find him travelling the globe, coaching a fitness class, or cheering on his favorite sports teams (Go Dolphins!)